A few weeks ago, I burned the top of my hand while cooking. My hand touched a very hot oven!
A patch of the burn was first degree. There were also 2 circular blisters (second degree burns).
I’d like to share with you how I treated these burn scars and greatly minimized the scarring.
My main concern throughout this period was excess scarring. I have thin skin that easily scars. It is Fitzpatrick Skin Type 3, which carries some risk for scarring and hyperpigmentation.
Two things typically happen to my skin after it has been injured and the skin has been cut open:
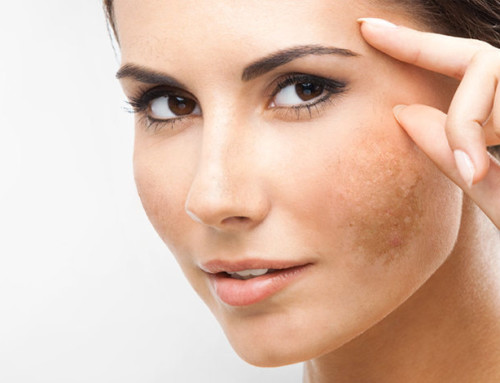
1. I develop thick scar tissue. A raised scar. This is known as hypertrophic scarring. A keloid scar is a type of hypertrophic scar. You can see an example of this below.
2. The color of my scar darkens. This is known as post-inflammatory hyperpigmentation (PIH).
BURN SCAR TREATMENT CASE STUDY
BLISTERS – Phase I (Open Wounds)
After the burn, some parts of my skin blistered. Then the blisters opened up, exposing raw skin.
I waited for new skin to grow over the raw skin. During this time, I applied antibiotic ointment (such as Neosporin) to prevent infection. After a few days of this, I switched over to petroleum jelly. (You can’t apply antibiotic ointment too frequently, and it’s not recommended for more than a few days).
I also kept the skin lightly covered with gauze or a band-aid. Not tightly though, because the skin needs to breathe.
The purpose of covering it was to protect the open wound but also to prevent sunlight from reaching the skin (UV light triggers the production of melanin, which causes the skin to pigment).
The most important thing during this time of healing (when skin is opened) is to keep the skin moist at all times and not let it dry out. This will minimize scarring. A sticky ointment is the best way to keep the area moist. Moisturizers and oils dry out.
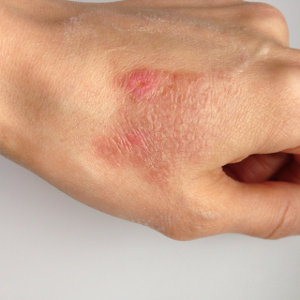
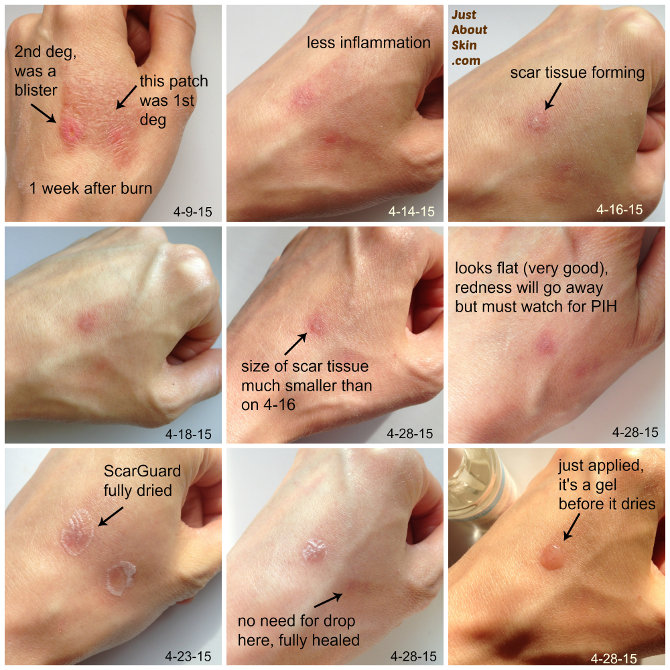
First and second degree burns. New skin has formed over the blisters.
BLISTERS – Phase II (Closed Wounds)
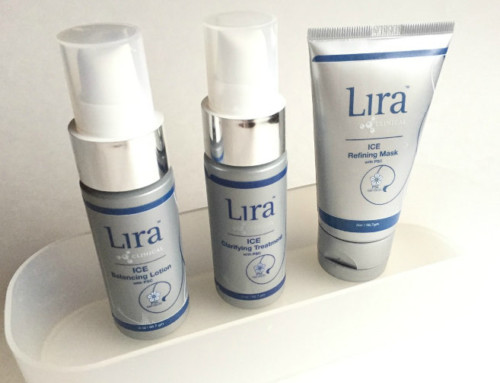
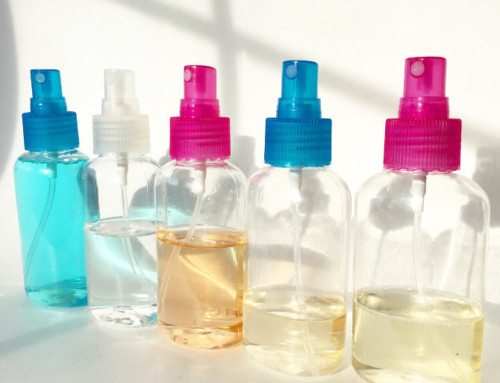
Once the blistered skin had fully closed (about a week later), I began applying ScarGuard to the area.
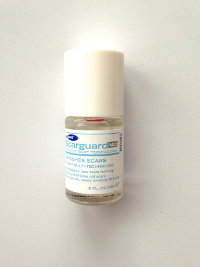 Scarguard is a silicone gel treatment that minimizes the formation of scar tissue. The silicones are the ingredients that do that.
As you can see from the picture, ScarGuard comes in a bottle with a brush, like you would find in a bottle of nail polish. You brush the area with the gel twice a day.
I find the brush very convenient – it makes it super easy to cover the area exactly, especially if it’s a small area. And it’s not messy (no fingers needed to apply).
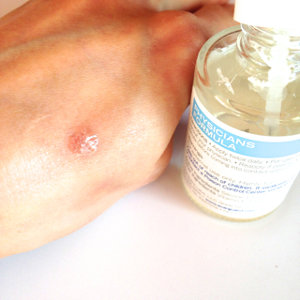 The gel dries quickly. In about 1-2 minutes, it becomes a flat crust over the wound. It doesn’t come off easily from rubbing, which is convenient because I don’t like having to re-apply something that has rubbed off. It also doesn’t wash off in the shower. But surprisingly, it is very easy to peel off when you need to remove it.
My treatment is the stronger, physician strength version (12.75% silicones). You can buy the retail version with a slightly lower concentration of silicones.
An alternative to using a silicone gel treatment is silicone sheets. These are gel sheets that you cut to size and stick onto skin like a band-aid.
My newly formed skin at this point was tender to the touch. After a few days, when it became less tender, I began applying just a little bit of light pressure to the scar, but not too much. My goal was to flatten the scar. If If I rubbed it too hard, it could spread the tissue (make the area wider).
Massaging a new scar helps minimize its growth. Scars can become thick. I want mine to stay flat and not become raised. So I will be massaging the area regularly (every day several times a day or whenever I remember).
I used one of my face oils with the massage. Any oil will do, but I chose a face oil with a blend of oils, in order to nourish my skin with fatty acids. This helps with healing.
BLISTERS – Phase III (Continued Healing)
Of the two blisters, the smaller one completely closed up and disappeared. The larger blister is still red and has a small patch of scar tissue.
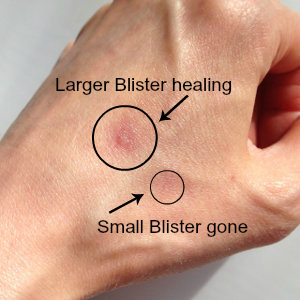 I’m very happy with the healing so far. That patch of scar tissue is significantly smaller than the original size of the blister, which was about the size of a dime. Unfortunately, I do not have a picture of that original blister to show you. You probably wouldn’t want to see it anyway. It was not a pleasant sight.
The ScarGuard helped tremendously. I could see my skin trying to form excess scar tissue, but the ScarGuard prevented that growth and actually minimized the amount of tissue.
My scar is flat as a result. (Whew!) But I need to keep it that way. It will want to grow. So it still needs continued treatment with a silicone product (either the gel or sheets) and massage.

Large keloid scar on arm (very old scar)
By the way, the picture on the left is a raised scar (keloid) on my arm from many years ago. This is exactly what I did NOT want to happen. As you can see, the scar tissue is very obvious, it’s raised (it was even more raised before I got a cortisone injection to help reduce the size), and the scar tissue is lighter in color (this is from the injection).
The redness of my healing scar is normal. It will take a while for it to go away. It will also likely get darker, due to post-inflammatory hyperpigmentation.
To prevent this darkening, I am doing the following:
- keeping my hand out of direct sunlight
- wearing a glove over my hand while driving or if outside. I always wear gloves while driving, but now I’m wearing a glove if I’m outside for more than a few minutes. The sun is strong here.
- applying a heavy zinc-based sunscreen over my hand
FIRST DEGREE BURNED SKIN
As you can see from the photo below, the skin that was burned first degree got red, dry, and very wrinkled.
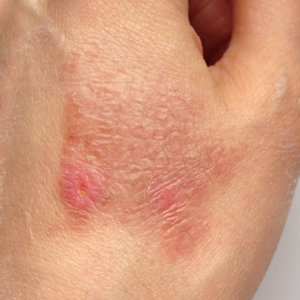
The brownish patch is the first degree burn. The brighter colored red areas are where the blisters were.
To treat this inflamed skin, I rubbed face oils and moisturizers over the area repeatedly throughout the day.
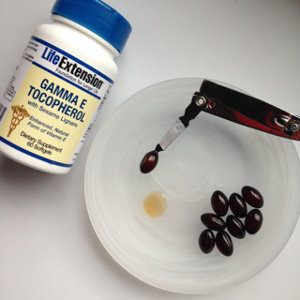
I also broke open Vitamin E capsules (the Vitamin E is in an oil) and rubbed the oil over the area. Vitamin E is commonly thought to help with wound healing. But there are inconclusive studies about whether Vitamin E can actually help. Also, Vitamin E may cause contact dermatitis in some people.
In my case, I didn’t have any problem with Vitamin E. The rich, sticky oil in my Vitamin E capsule (by Life Extension) was actually nourishing for my skin.
 My goal in all these steps was to reduce the inflammation first, and then nourish the skin to rebuild the lipid barrier. It was damaged, which you can see by the severe shriveling and dryness.
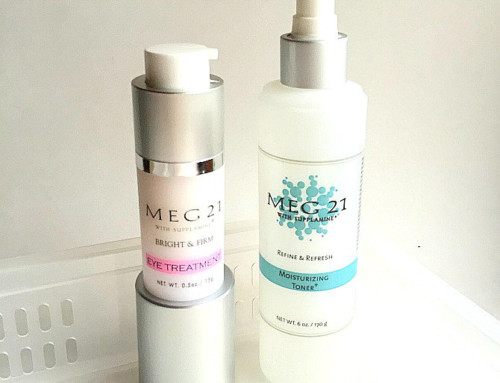
I specifically chose barrier repair moisturizers, soothing moisturizers with anti-inflammatory ingredients, and a French scar cream called Biafine, which is popular for post-procedure skin.
The skin healed itself very well. The redness is mostly gone now. The skin also looks like normal skin now (no longer wrinkled).
Overall, I am very happy with the results of the ScarGuard gel treatment. I am continuing to use this gel twice daily, massaging the scar, and keeping the affected areas richly moisturized at all times.
Stay tuned for the next post, when I show the Before & After results of my Scarlight treatment. It lightened a dark scar on my foot!
Related Posts:
- How I Faded A Dark Scar With ScarLight
- Risks for Skin of Color
- Post-Inflammatory Hyperpigmentation
- Inflammation
- The Importance of the Skin Barrier
Want articles & posts delivered straight to your inbox? Sign up for the weekly newsletter here.


Almost 7 year ago whene i cooking my lage was brun.so now i have brun spots.i want clear my brun spot.so please tell me what type medicine i use my spot place?
I’m sorry you had a cooking burn. The spot you see now is a scar that is due to post-inflammatory hyperpigmentation. You need a lightening treatment, but because of the age of the scar, it may not effectively fade with a topical product. Another alternative is to get IPL or laser treatment.
The fastest way to lighten a spot topically is with a lightening ingredient called Hydroquinone, which is available in ScarGuard’s SCARLIGHT, a product I used on a dark scar on my foot. However, this ingredient is controversial and carries some risks. If your skin tone is Fitzpatrick Type 1-3, you can first try a lightening serum containing Hydroquinone in a concentration of 2% or less. (More than 2% is possible with a doctor’s prescription in the U.S., but I would not start with a concentration greater than 2% due to the risks).
If you’re Fitzpatrick Type 4-6, I would not use Hydroquinone, especially on the face, because there is a risk of over-lightening or even darkening. In this case, look for a non-Hydroquinone lightening product, preferably a serum. There are many for sale, but they are inconsistent in terms of how they work for people. People respond differently to brightening ingredients. So it’s unfortunately a trial and error process finding one that works.
I recently spilled hot soup on my hand which led to a burn, it is lightly wrinkled and i peeled of some skin by accident. How should i treat this? (One week old)
Keep any exposed skin (the part that’s peeled off) moist with anti-bacterial ointment or petroleum jelly. It will minimize scarring.